Friday, September 30, 2011

Q&A with Renée Lavallée (a.k.a. The Feisty Chef)

Reneée Lavallée is one of those women who manages to do it all–cook, write, teach, and make frequent television appearances–without breaking a sweat. And did I mention she has two little ones under age three? The Halifax-based chef has cooked in restaurants all over the world, from Toronto to Umbria, Italy, though now she's content to juggle her multiple roles as mom, chef, and writer outside the confines of a restaurant. Passionate about cooking as locally as possible, her blog The Feisty Chef highlights the natural bounty of Nova Scotia and offers great cooking tips and recipes (like the one for pickles below). I caught up with Renée while I was in Nova Scotia earlier this week and we chatted about cooking, dinner parties, and her life-changing run-in with Oasis front-man Liam Gallagher.


The Yellow Table: What first drew you to cooking?

Feisty Chef: I've always enjoyed cooking–every aspect. After doing very poorly at university, the choice was given to me: either buckle down and stay, or finding a new path...cooking. I applied to George Brown in Toronto, and the rest is history.

TYT: How did you get the name "The Feisty Chef"?

FC: Many moons ago, when working in Toronto, the band Oasis came in and I had quite an encounter with Liam Gallagher (the lead singer). After a brief fight over what music to play, he turned to me and said "you are quite a feisty lady...I like that". When I started my blog in 2009, the incident came to mind and the name stuck.

TYT: You've been a chef now for 16 years. What would you tell someone who wants to quit their job and become a chef?

FC:
Be prepared to work. It isn't at all like TV...it's stinky, dirty and sometimes very degrading. Before doing anything, check out a "real" restaurant kitchen for a few nights to see what it is like. Better to do your homework before, than quit and hate it after.

TYT: Tell us a bit about your monthly "family dinners." I love the concept of gathering people from the community around big long tables (it's very in line with The Yellow Table philosophy)!

FC: The TIBS Family Dinners came about a year ago. The owners of Two If By Sea Cafe in Dartmouth and I thought it would be cool to host dinners in their space after hours. Each month, I come up with a menu that uses all local and seasonal food, we sell seats (45 max), and I do all the food except dessert (I am horrible at pastries). It is a true family affair–my husband helps, as does Alexis (one owner's wife), and our friends. It is a great community gathering, bringing together people from around the neighborhood and city and seating them together.

TYT: How has having two little kids affected your cooking style?

FC: My food has become simpler, less constructed. Gone are the "fine dining" days and now it is all about bringing out the most [flavor] in the amazing ingredients we have here in Nova Scotia.

TYT: What are five ingredients you always have in your pantry?

FC: Extra virgin olive oil, lemons, chilies, sea salt, Italian parsley.

TYT: What would you make tonight if you had to throw an impromptu dinner party for 8?

FC: It is Fall and the leaves are starting to change color. I'd make something warm and fuzzy...roasted squash salad with pumpkin seeds and walnut oil, and shaved Old Growler Gouda. Roasted pork leg with crackling, Brussels sprouts with bacon, beets and yellow beans. For dessert, salt roasted pears with caramel.

TYT: You teach cooking classes as well–what's a cooking tip you like to share with your students?

FC: Keep it simple! Go into your kitchen with confidence and take some chances, but keep it simple.

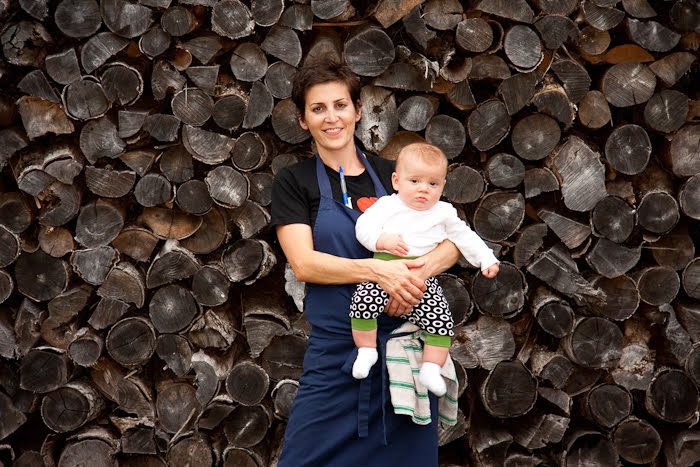
Follow Renée on her blog The Feisty Chef or on Twitter @feistychef.

THE FEISTY CHEF'S DILLY PICKLES

Makes approximately 20 (500ml) jars

7 lbs baby cucumbers, washed
3 heads garlic cloves, peeled and kept whole
1 bunch dill about to seed

Brine:
19 cups water
5 1/2 cups white vinegar
1 cups coarse salt

Sterilize the jars and tops and set aside. Make the brine by combining the ingredients and bringing to a boil; set aside. Place the washed cucumbers in the jars, making sure to get as many shoved in there as humanly possible. Don’t be scared to use a little muscle. Add 3 cloves of garlic and a few sprigs of the dill to each jar. Cover with the brine, seal, and process in simmering water for 13-15 minutes.

We ate our first jar after a week and they were great. If you have more will power than us, you could probably leave them for a little longer to maximize the flavour. Enjoy. And remember, you will always be loved if you show up with a jar of homemade pickles!


click for recipe & more…
Your two cents...

If you don't have a Google login, please select Name/URL from the "Comment as" list below

Thursday, September 29, 2011

Healthy Living: Fall Quinoa Salad


I'll be honest: a few years ago I had never even heard of quinoa. I've loved couscous for years, but quinoa wasn't on my radar until recently. Now this fluffy grain seems to be everywhere, touted as a "super-food" and praised for its nine essential amino acids and high protein content. It's also gluten-free, which is great news for people who have gluten allergies. I finally broke down and bought some a few months ago and, even though it takes a bit longer to cook than couscous (15 minutes instead of 5), its nutty flavor and light texture hooked me instantly. It also blends well with practically everything, and can be stored in the fridge for several days after being cooked.

This recipe was actually inspired by some leftover quinoa I had in the fridge yesterday. I also had some butternut squash, baby spinach, red onion and dried cranberries (a fabulous combo my friend Dori introduced me to) on hand, so I just sort of went from there. I've made quinoa salad with all sorts of flavor combinations–it's great in the summer with a ratatouille blend (roasted eggplant, peppers, tomatoes, and zucchini) and in the fall and winter with any sort of squash and dark greens. I admit, I sometimes buy butternut squash already peeled and cut from Whole Foods or Trader Joe's, which cuts down on prep time considerably. But if you're buying a whole squash, you might want to wear some plastic gloves while peeling and cutting it. Some people (myself included) have allergic reactions to raw butternut squash–my hands will dry out immediately and begin to crack. It's really weird, so I just wear gloves now when I'm prepping butternut squash.

I love making dishes like this that are as colorful and delicious as they are healthy–AND that use up leftovers! This makes a great meal all by itself or a perfect side for a piece of fish or some roast chicken or pork.

QUINOA SALAD WITH BUTTERNUT SQUASH AND SPINACH

Serves 4

2 cups peeled, cubed butternut squash
1 small red onion, halved and thinly sliced
2 tablespoons olive oil, divided
Salt and pepper to taste
1/4 tsp. cayenne
1 bag baby spinach
1/2 cup dried cranberries
1 cup cooked quinoa

Preheat the oven to 425 degrees.

Arrange the butternut squash and onion on an aluminum foil-covered baking sheet and drizzle with 1 tablespoon olive oil. Season with salt and pepper and 1/4 teaspoon cayenne and toss to combine. Roast for 30 minutes or until tender and just beginning to brown.

Meanwhile, steam the spinach for 1-2 minutes until bright green and slightly wilted. Drain and squeeze out any excess water.

In a large bowl combine the squash, onion, spinach, dried cranberries, quinoa, and the remaining tablespoon of olive oil. Season with salt and pepper to taste. Serve warm or at room temperature.

(NOTE: This is also really delicious with toasted pine nuts!)


click for recipe & more…
Your two cents...

If you don't have a Google login, please select Name/URL from the "Comment as" list below

Wednesday, September 28, 2011

A Cook's Garden: New Brunswick, Canada


I just got back from a whirlwind trip to Atlantic Canada. I tasted my way around New Brunswick, Prince Edward Island, Newfoundland, and Nova Scotia...all in six days!! It was an inspiring trip and I met loads of talented chefs, fishermen, and gardeners. As you can imagine, the seafood in the coastal areas was phenomenal. It seemed like everything I tasted–oysters, lobster, scallops, mussels, halibut, cod, or tuna–had just come off the boat that day. I got to taste Colville Bay oysters straight out of the ocean on Prince Edward Island and had fried cod tongues in Newfoundland. Lobster rolls were everywhere in Nova Scotia (even, I'm told, on the menu at McDonald's) and I had the best scallops of my life in New Brunswick.

Despite all of this amazing seafood–not to mention the wonderful wines in Nova Scotia–one of the things that impressed me the most were the beautiful gardens. It seemed like every chef I met had his or her own garden, growing all manner of vegetables, fruits, and herbs for their restaurants and families. I had a chance to spend an afternoon in the garden with Chris Aerni, the chef/owner of Rossmount Inn outside St. Andrews, New Brunswick. Originally from Bern, Switzerland, Aerni and his wife Graziella settled in New Brunswick over ten years ago after falling in love with the area on a family vacation. They bought the inn–an 18-room historic manor overlooking the Passamaquoddy Bay–and began serving seasonal dinners using produce from their garden, mushrooms and berries from the surrounding woods, and seafood from the nearby Bay of Fundy. It doesn't get much more local than this. Word about Aerni's simple, garden-to-table fare has definitely spread, and the Rossmount Inn is now considered one of the best restaurants in the area.


But back to the garden. Armed with a basket and a small paring knife, Aerni and I strolled through his 3-acre garden in the drizzling rain. He pointed out all sorts of unusual plants he grows, cutting off samples for me to try. "This is a chioga beet," he said as he cut the tip off a tiny beet, revealing a candy-striped interior. He pulled brightly colored carrots from the ground–not only orange, but purple and yellow. He dug up purple potatoes (which later turned up on a scallop dish that night, thinly sliced and fried) and let me taste golden raspberries (those made an appearance in the dessert). I tried lovage (which tastes a bit like celery), tart gooseberries, nasturtium flowers, and the sweetest tomatoes I've ever tasted, so dark they were nearly black. He showed me a huge bush of bergamot–"we steep it like tea to make a syrup for dessert," he explained as he handed me a few leaves to smell. Walking through the garden was like a culinary crash course for me. Every single plant could be used fresh, and most could be preserved as well. Aerni shared all sorts of tips as we walked like, "pickled shiso leaves are delicious served with salmon and chicken," and "you can make wonderfully aromatic oils from nasturtiums." Who knew?


"I like to grow things you can't buy," Aerni explained. Anything he doesn't grow himself, he buys from the local organic Bantry Bay Farm. Given that the seasons are slightly later there (they have a very short summer that doesn't really start until late June), tomatoes were in full swing and I have never seem more beautiful heirloom tomatoes in my life. He grows over ten varieties, mostly grown in a greenhouse to protect them from the elements. I was in for a treat that night with a beautiful heirloom tomato salad, simply dressed with a balsamic vinaigrette, basil, and a few edible flowers. Heaven.

After the garden tour, Aerni asked if I'd like to go look for some mushrooms in the nearby forest. "It's chanterelle season," he explained. "And if we're lucky we may find some bolletes." There was no consideration on my part...despite my soggy shoes and lack of warm clothing, my answer was a definitive yes. I've always been curious how to know which mushrooms are edible or not, and here was my chance to go foraging with an expert guide.

There were no paths in the woods (or at least if there were, we didn't take them). Aerni plunged ahead, under branches, over logs, with an eagle-eye vision for fungi. It was incredible–where all I saw was a sea of green and grey, he saw dots of orange and brown, and sprinted ahead to examine them. He said he grew up foraging for mushrooms as a kid in Switzerland with his mom and siblings and several other families. After they gathered their mushrooms, they'd take them to a "controller's" house in the village–basically the mushroom expert who would sort through them and say which ones were edible and which were poisonous. He learned how to identify the good ones from the bad ones by watching the controller.


Each time he spotted mushrooms, he'd take a close look and toss the ones that had been eaten by snails. He also showed me several that looked perfectly good to me, but that were actually quite poisonous. ("Either you know, or you die!" he joked.) Within an hour, we'd nearly filled a basket with chanterelles, horse mushrooms, a few bolletes, and even one King Bollete (porcini). Amazing. We headed back to the inn and a few hours later, he had prepared a fantastic dinner using many of the ingredients we had gathered that day. The mushrooms were phenomenal–so fresh, so earthy, and so simply prepared. He didn't attempt to mask the flavors in any way–he just quickly sautéed them in butter with some shallot and white wine, garnished them with chives, and served them over a lightly toasted slice of baguette. Absolute perfection.

Given that I live in a walk-up apartment in Manhattan, gardening and foraging aren't exactly feasible options for me right now. But I definitely have a whole new respect for the gardener, and the intimate connection between the cook and the garden (and the forest!). I had a ball learning how everything was grown, and getting to taste and smell things in the garden and in the woods that would appear–just a few hours later–on my plate.

I think next year, I'll just start with a few potted herbs on the roof. I'm sure I can manage that. As for the mushrooms, I'll leave that to the experts.

SAUTEED WILD MUSHROOMS

Serves 4 to 6

2 pounds mixed wild mushrooms (such as chanterelle, porcini, crimini, or shiitake)
4 tablespoons (1/2 stick) butter
1/2 cup minced shallots (about 2 large)
Sea salt and pepper to taste
1/4 cup white wine
2 tablespoons chopped fresh chives (or parsley)

Brush any dirt off the mushrooms with a damp paper towel or a mushroom brush (yes, they actually exist!) and remove the stems. Do NOT rinse with water, as that will make them soggy.

Heat the butter in a large heavy bottomed saute pan over medium high heat, until melted. Add the shallots and cook until translucent, stirring occasionally, about 3-4 minutes. Add the mushrooms and season with salt and pepper.

Cook over medium heat for 8 to 10 minutes, until softened beginning to release some juices. Add the white wine and increase the heat; let simmer for 1-2 minutes until evaporated.

Taste and add more salt and pepper if needed. Stir in the chives (or parsley) and serve over toasted baguette slices as a starter, or as a side dish with roasted pork or game.

*Note: This is not Chris Aerni's exact recipe, but rather my adaptation based on his verbal instructions.


click for recipe & more…
Your two cents...

If you don't have a Google login, please select Name/URL from the "Comment as" list below

Friday, September 23, 2011

Dinner Party: Roasted Branzini and Brussel Sprouts


I love dinner parties (clearly). And in spite of the fact that I've thrown hundreds in my life, I still get a little nervous having people over if I don't have time to prep in advance. I hate feeling rushed, which is why I try to get as much done ahead of time as possible. For me, entertaining is the most fun when the apartment is clean, the food is more or less prepped, and I can actually sit down and have a drink with guests when they arrive. Of course in reality, things never go quite as smoothly as I plan–I can't tell you how many times I've jumped in the shower and heard the doorbell ring! But if there's one thing I've learned from entertaining, it's this: if you're short on prep time, Keep. It. Simple. Your friends aren't expecting you to recreate The French Laundry in your apartment. If anything, they'll be happy to get a home cooked meal and will love whatever you prepare.

So when Brandon asked me the other day if some friends could come over for dinner, I hesitated, as it was a day where I'd literally be getting home at the same time they'd be arriving. I seriously considered ordering takeout. But then I thought about it a bit more and gave myself a little pep talk. (I'm not Thomas Keller, etc.) And I realized that I could cook a beautiful, simple meal in the same amount of time it would take to wait on a pizza delivery. I came up with a game plan: I'd run by the grocery on my way home, then throw together a little appetizer platter (I already had some cheese, crackers, charcuterie, and olives on hand) for everyone to munch on when they arrived. For the meal, I decided to make roasted branzini (Mediterranean sea bass) stuffed with lemon and thyme, roasted Brussels sprouts, and roasted baby potatoes–the prep is minimal and everything cooks together in a 425 degree oven. Which would give me time to sit and have a leisurely glass of wine with my friends. Perfect!


I find that a lot of people are intimidated by whole fish. They're not sure how to cook them, and how to get the bones out afterwards. Or maybe they're just creeped out by the eyes staring back at them. Nonetheless, roasting whole fish is so easy. You can ask the fishmonger to scale the fish and remove the guts, so all you have to do is stuff the cavity with herbs and thinly sliced lemons, season with salt and pepper, drizzle with olive oil, and pop them in the oven. Buying whole fish is much cheaper than buying fillets ($11.99/lb. for whole branzini versus $24.99/lb. for sea bass fillets), but the best part of all is the flavor. Roasting fish on the bones keeps the flesh moist, and it takes on the taste and aroma of whatever herbs you've stuffed inside the cavity. The bones are a bit tricky, as there always seem to be a few tiny ones mixed in even after deboning–just eat carefully and you should be fine.

In the end (despite my initial fears), the dinner was fun and relaxed. I put out the hors d'oeuvres, poured some wine, and one of my friends helped me assemble the fish and Brussels sprouts. We had everything in the oven in about 10 minutes, and we all headed up to the roof. When we came downstairs 25 minutes later, the apartment smelled heavenly and dinner was done! My challenge to you this weekend is this: go out and buy a whole fish (or two or three). Follow the recipe below–it's completely non-intimidating–and invite some friends over. No more excuses, just try it. You'll be hooked.


ROASTED BRANZINI WITH BRUSSELS SPROUTS

Serves 4

1 pound Brussels sprouts, halved
2 tablespoons olive oil, plus more for drizzling
Sea salt and freshly ground pepper
3 (1 lb.) branzini (or two 1 1/2-lb branzini)
Thyme sprigs
1/2 lemon, thinly sliced

Preheat the oven to 425 degrees F. Cover two sheet trays with aluminum foil or parchment paper.

In a large bowl, toss the Brussels sprouts with 2 tablespoons of the olive oil and season with salt and pepper. Place the Brussels sprouts in the oven.

Meanwhile, pat the fish dry with paper towels, inside and out. Season the cavities with salt and pepper and stuff with thyme sprigs (6 or 7) and lemon slices.

Arrange the fish on the second sheet tray, season with salt and pepper, and drizzle with olive oil. Place the tray in the oven with the Brussels sprouts (on the lower rack) and roast for 20 to 25 minutes or until the flesh is flaky and cooked through, and the Brussels sprouts are lightly browned.

To debone: Using two forks, remove the top skin from the fish and discard. Carefully remove the top fillet to a warm serving platter. Lift out the backbone and ribs, and remove the bottom fillet. Repeat with the remaining fish. Arrange the Brussels sprouts on the platter with the fish. Squeeze with lemon juice and drizzle with olive oil. (Optional: garnish with fresh chopped parsley.)

Serve with roasted potatoes.


click for recipe & more…
Your two cents...

If you don't have a Google login, please select Name/URL from the "Comment as" list below

Wednesday, September 21, 2011

The Best Nutella Crêpe Recipe

On a gray day like this, I get nostalgic for Paris. There are so many things I love about that beautiful city, and admittedly, many of them are food-related. A perfectly ripe apricot at a summertime market. A flaky croissant from Poujauran. A still-warm baguette l'ancien from Jean Millet (well worth the wait in line). A glass of bubbly on the terrace at Le Fumoir. A whimsically flavored–and perfectly executed–macaron from Pierre Hermé. Perhaps my favorite thing of all, however, is a 3 Euro takeout treat found all over Paris: a piping hot crêpe oozing with Nutella.


After extensive taste-testing, however, I have realized that a crêpe is not a crêpe. There are the crêpes that are too dry, too soggy, that skimp on the Nutella, or–worst of all–the crêpes that are made in advance and and sit in a limp pile for hours, merely reheated when you order. I've found perfection only once, in a nondescript spot on the Boulevard St. Germain, near Cluny. I stumbled upon Crépuscule many years ago while studying at the Sorbonne–one perfectly browned Nutella-filled crêpe from their takeout window was all it took for me to fall hopelessly in love.

A couple of things set their crêpes apart: 1) they brown their crêpes just long enough for them to remain slightly crisp on the outside. Being a sucker for texture, I love the contrast between the crisp exterior and the creamy hazelnut filling. 2) They have a secret ingredient in their batter: sucre vanille. These little packets of vanilla sugar are sold all over France and are often used in baked goods, giving it an extra vanilla boost. I've bought vanilla sugar in France to make the recipe at home, but if you can't find it, you can substitute vanilla extract. 3) They have achieved the perfect Nutella-to-crêpe ratio. As in, they smooth the Nutella evenly over half the crêpe, so you get an equal spread of Nutella on every single bite. Heaven.

I continue to return to my favorite spot every time I return to Paris, and the crêpes are always just as good. Nutella is clearly my favorite filling, but they also have other delicious options: lemon and sugar, rich chocolate sauce, or butter and jam. And on the savory side, they've got all manner of hearty gallettes, the traditional Breton pancakes made with buckwheat flour. Ham, cheese, and egg is a classic, but I love their goat cheese and spinach gallette for a light lunch.

Even if you never come to Paris, crêpes are amazingly easy–and cheap–to make at home. You just need a flat-bottomed crêpe pan (ideally) or a thin-bottomed non-stick skillet (you can get one for less that $20
here). There are special wooden sticks sold in France to flip your crêpes, but you can just use a nonstick spatula. (Or, of you get really good, you can flip them in the air like the pros). The key when making crêpes is to blend the batter really well so there are no lumps (a blender is great for this), to let it sit in the fridge an hour before cooking, and to learn the proper pan rotation so the batter spreads thinly and evenly. This will all take a bit of practice, but after you've tried it a time or two, you'll be hooked.


Crêpes are great party food–make a stack as people arrive and lay out a variety of toppings so everyone can assemble their own dessert. Your friends will definitely be impressed that you made them from scratch! Though the recipe below is for dessert crepes, be sure to try my recipe for buckwheat galettes
so you can experiment with savory fillings as well. Bon appetit!

SWEET CRÊPE BATTER

Makes about 20 crêpes

2 eggs
1 cup milk
1/4 cup water
2 teaspoons vanilla
1 cup all-purpose flour
2 tablespoons sugar
2 tablespoons melted butter, plus more for pan

If you are in need of a crêpe pan, you can get one on the cheap here. My favorite spatula is from Krampouz and will run you about $15, available here.

Place all the ingredients in a blender and blend until smooth. If you don't have a blender, whisk the eggs, milk, water, and vanilla together in a bowl until smooth. Add the flour and sugar and whisk to combine. Whisk in 2 tablespoons of the melted butter. Strain the batter into another bowl. Cover with plastic wrap and place in the refrigerator for at least an hour to allow all the air bubbles to settle.

Heat a small crêpe pan (or nonstick skillet) over medium high heat. Swirl 1 teaspoon of butter in the pan and add a small amount of batter to the pan–swirl the pan so that the batter evenly and thinly coats the bottom. Cook for about 30 seconds (until lightly browned) and flip. Cook for another 10-15 seconds and remove to a plate. Continue cooking the rest of the batter, adding additional butter every third crêpe or so. Place the crêpes on a sheet tray, cover with aluminum foil, and keep warm in a 225 degree F oven until ready to serve. (NOTE: They taste best right out of the pan, so don't let them sit too long in the oven!)

To serve: Spread each crêpe with your desired topping: Nutella, warm chocolate sauce, jam, butter and sugar, lemon, etc. and then fold in half, then into fourths, like a napkin. Dust with powdered sugar and serve warm.


Your two cents...

If you don't have a Google login, please select Name/URL from the "Comment as" list below

Monday, September 19, 2011

Traverse City Part II: Leelanau Peninsula

For me, there is no better way to start a day than with just-baked croissants, homemade jam, and a piping hot café au lait. During my time in France, that was my standard breakfast and even now, I find myself craving this combo. The problem is, it's surprisingly hard to find fresh, flaky croissants (made with real butter) in the U.S. Even living in Manhattan, I find it hard to find good ones–they're either too big, too soft, too dry, or perhaps worst of all, stale. I keep tasting, nonetheless...


Which is why I was blown away to find these beauties in Traverse City, at
9 Bean Rows
, a tiny bakery down the street from our B&B. We stopped by our second morning, and were greeted by the incredibly friendly owner/baker Jen Welty. Considering the woman bakes most nights from midnight til noon, she was enviably chipper. The still-warm croissants (and pains au chocolat and almond croissants and apricot pinwheels) were cooling on sheet trays behind the counter. Rows of crusty European-style breads, all naturally leavened and baked in a wood-burning oven, lined the shelves alongside beautiful little individual quiches. In addition to a croissant and pain au chocolat–which were by far the best I've ever had outside France–we had to try a goat cheese and spinach quiche. Not only is everything in the bakery made from scratch, but many of the ingredients, like the eggs and the spinach, come from their farm.


As the sign above the door ("Artisan Farm and Bakery") indicates, the 9 Bean Rows operation extends far beyond the kitchen. While Jen holds down the fort at the bakery, her husband Nic runs their 11-acre CSA (Community Supported Agriculture) farm at Black Star Farms. They are committed to their mission of providing fresh, local, foods to their community year-round via their CSA boxes. Though they've been farming for years, their bakery storefront just opened last November (Jen had previously sold her baked goods at local farmers markets). I just wish we lived closer...I'd happily take part in their mission by enjoying their fresh veggies, eggs, and warm croissants year-round!


After breakfast, we hopped in the car to go explore Leelanau Peninsula, a sprawling area area northeast of Traverse City that stretches from Grand Traverse Bay to Lake Michigan. (It's also where Mario Batali has his summer home, FYI.) Dotted with vineyards and farms like Old Mission Peninsula (only much larger), Leelanau is home to charming little fishing villages like Suttons Bay and Leland, beautiful beaches, and according to ABC's Good Morning America, THE most beautiful place in America–Sleeping Bear Dunes National Park. But more on that later...


Our first stop was Black Star Farms, a sprawling property home not only to Jen and Nic's farm, but also a winery, creamery (called Leelanau Cheese), an inn, and a horse farm. We walked around the property, tasted some wines (not great) and some cheese (very good), and headed down the road to visit a winery I was especially excited about: L. Mawby. On our way, we passed several vineyards covering their vines in a fine netting. I'd never seen anything like this before, so I asked one of the workers what they were doing. He said with harvest coming up, they were covering the vines to protect the grapes from the birds. It certainly looked like a lot of work, but I suppose protecting the grapes at this time of year would be top priority.


Just down the road from Black Star Farms, L. Mawby was high on my list of things to places to visit because they specialize in my absolute favorite type of wine: sparkling. Tasting bubbly on a beautiful afternoon (err...late morning) sounded perfect. We walked into the tasting room and felt like we had just stumbled into a party. Rock music was cranked up, the place was packed, and everyone had flutes in their hand. They offered two free samples to start, and then you could order two additional 2-ounce pours for $5. Things were off to a good start.

Sitting out on their back porch overlooking the vines, we sampled a variety of bubblies, from dry to semi-dry, a crémant and a rosé, and their vintage "Talismon" (which tasted a bit like liquid smoke for some reason). By far and away, our favorite was their Methode Champenoise Blanc de Noirs–the same one we had sampled at Cook's House. Clean, crisp, with some complexity from the pinot noir grapes, this is the only one we considered buying. Many of their bubblies were on the sweeter side, though the salmon-colored Rosé (which happens to be called "Sex") was still pretty delicious.


We drove up to Sutton's Bay for lunch, and stopped for lunch at Martha's Leelanau Table, an adorable French-style bistro with a garden patio and a bright red facade. The spinach salad with local dried cherries, blue cheese, and warm bacon vinaigrette was out of this world, and came with a little homemade biscuit. (With all the wine and baked goods on this trip, it's a good thing we did plenty of walking!)

After lunch, we saw a sign pointing to a public beach, so we followed the bumpy road all the way to the water and discovered a beautiful little grassy park. Not exactly a beach, but a perfect spot to stretch out a blanket, read a book, and take a nap. It was another blue sky day, sunny with a cool breeze, and we stretched out by the water watching the boats and jet-skis in the distance. Pretty idyllic, I know.


Next stop: Sleeping Bear Dunes National Park, a 35-mile stretch along Lake Michigan full of sand dunes (some as high as 450 feet), hidden beaches, forests, and hiking trails. I had never heard of this place before we visited Traverse City, but every single person we met in the area insisted that we had to go hiking there. One of the guy's at Two Lad's was nice enough to pull out a map and highlight exactly which spots we should visit: Pyramid Point at sunset, the 2.8-mile Sleeping Bear Point trail by day, and the Pierce Stocking Scenic Drive for the best lookouts in the area.

It's hard to put into words just how pristine, and how awe-inspiring, this area is. I've never seen such a diverse landscape, where one moment you're hiking through the woods, then suddenly the dirt turns to sand, you reach a clearing, and stretching in front of you is water as far as the eye can see. As a Michigan boy, Brandon is used to the sheer size of Lake Michigan, but for me it was incredible. I looked out at the shimmering water and felt like I was gazing at the Pacific Ocean. It's just so vast. We made it up to Pyramid Point in time for a gorgeous sunset, marveling at our smallness in light of something so majestic.


We headed back the next day to do the Sleeping Bear trail, which involved hiking nearly 3 miles in rather deep sand. There were moments where all we could see was white, and then suddenly we would crest a dune, and there was Lake Michigan shimmering hundreds of feet below. We hiked through "ghost forests," areas of long-dead trees that had created eerie formations in the sand, and eventually made it into the woods and under the welcome shade of trees. And then eventually back out to this incredible lookout point, perched 450 feet above the lake.


Living in the hustle bustle of New York City, it's so important to get out of the city every once in awhile. To go on a hike, to roll down a sand dune and jump in a lake, to feel the grass in your toes. To taste a peach still warm from the sun. To have moments of sheer wonder. To remember how big God is and to feel humbled. To see the beauty in his creation. To gain inspiration to take back into the city.

This trip was more than just an anniversary trip...it was a lovely reminder to breathe. To stop and enjoy the simple pleasures, like a nap, a good book, or a home-cooked meal around the table with people I love. Which is what The Yellow Table is all about.


click for recipe & more…

Add a comment!
Your two cents...

If you don't have a Google login, please select Name/URL from the "Comment as" list below

Friday, September 16, 2011

Rooftop Party: Chicken Feta Sliders with Chimichurri


I love this time of year. Blue skies, cooler weather, but still warm enough to eat outside for a few more weeks. Despite the fact that we live in a fifth-floor walk-up (with occasional funky smells in the stairwell), all is redeemed by our little rooftop terrace. The views are pretty fantastic and when the weather is nice, it's my favorite place to have a glass of rosé and watch the sunset. We've had friends up many times and even without a grill, it's a fun spot to host a cookout.

The routine goes a little something like this: we start with drinks and appetizers outside, then I'll sneak down to the kitchen to grill some burgers (of fish or chicken), roast some sweet potatoes, and maybe steam some green beans or toss a salad. By then, the apartment is usually filled with smoke–we don't have a hood over the stove–so I'll open all the windows and turn on the fans and start waving dish towels. Finally, I'll lay all the food out on the table, everyone makes a plate, and we all head back up to the roof. I know this isn't a traditional "sit around the table" dinner party, but on a beautiful night, it seems a shame not to enjoy our outdoor space.

Given the weekend ahead (sunshine in NYC!), I wanted to share a few recipes to accompany your outdoor fête. I created these sliders for a party this summer as a healthier alternative to red meat. I decided to use ground chicken (though you could use turkey if you wanted), seasoned it with garlic, cumin, and a touch of cayenne, then added some basil, feta, egg, and–the secret ingredient–grated zucchini. The mixture was a little loose, so I added some breadcrumbs, which helped hold it all together nicely. I seasoned the patties with plenty of salt and pepper, grilled them in a hot grill pan, and served them on little brioche buns with avocado slices and my roasted red pepper chimichurri sauce.


Even though I was totally winging this dish for the party, they turned out to be some of the most flavorful, moist sliders I have ever had. Even Brandon, who hates zucchini, loved these. (Nothing like sneaking a few vegetables into your husband's food!) I've made them since, and realized they taste even better when grilled on a panini press (just an FYI for those of you who actually have a panini press). My non-traditional take on chimichurri sauce–packed with herbs, garlic, and roasted red peppers–is the perfect cookout companion. Delicious on the chicken sliders, it's equally good on burgers, steaks, grilled vegetables, and just about anything else you can throw on a grill.

Enjoy these last few fleeting days of Indian summer with good friends and good food this weekend. And if you have a grill, be sure light it up!

CHICKEN FETA SLIDERS

Makes 8 sliders

1 small zucchini
1 pound ground chicken
1 to 2 cloves garlic
1 teaspoon cumin
1/4 teaspoon cayenne
1 tablespoon chopped basil (or mint)
1/3 cup crumbled feta
1/4 cup beaten egg
1/2 cup fine bread crumbs, plus more if needed
8 slider buns

Grate the zucchini with a box grater on the fine setting (or use a handheld cheese grater). Using paper towels or a clean dish towel, squeeze all liquid from the zucchini.

Combine the zucchini with the chicken, garlic, cumin, cayenne, basil, feta, egg, and bread crumbs with a rubber spatula. Season with salt and pepper, and add more bread crumbs if the mixture seems too wet. (It should hold together easily when squeezed.)

Using your hands, shape the mixture into eight small slider-size patties. Season the patties with salt and pepper and grill on a hot, lightly oiled grill pan for about 3 minutes per side, or until cooked through. (Or, if you have a panini press, cook for about 5 minutes total, until cooked through.)

Serve the sliders on toasted buns with sliced avocados, arugula, and chimichurri sauce (recipe below).

ROASTED RED PEPPER CHIMICHURRI SAUCE

Though this is not a traditional chimichurri (which is usually limited to herbs, garlic, olive oil, red wine vinegar, and red pepper flakes), I sampled a similar roasted red pepper version in Buenos Aires several years ago and was hooked. This is my attempt to recreate it, and I think it makes just about everything taste better.

Makes about 1 ¼ cup (serves 4-6)

4 cloves garlic, peeled
1 8-ounce jar roasted red peppers, drained
1/2 red onion, finely chopped
Juice of 1 lemon
3 tablespoons red-wine vinegar
1/2 teaspoon dried hot red pepper flakes
1/2 cup fresh flat-leaf parsley
1/2 cup fresh cilantro
1/2 cup fresh mint
1/2 cup extra virgin olive oil
Salt and pepper, to taste

Combine the garlic, roasted red peppers, onion, lemon juice, red wine vinegar, and red pepper flakes in a food processor and pulse several times until combined. Add the herbs and pulse several more times to combine. With the processor running, add the oil in a slow steady stream until smooth. Season with salt and pepper to taste.

Feel free to add more herbs, more vinegar, more red pepper flakes—this recipe is very adaptable according to your taste buds!

Let sit at room temperature for one hour before serving, for flavors to combine. Also, it keeps well in the refrigerator up to 5 days.


click for recipe & more…
Your two cents...

If you don't have a Google login, please select Name/URL from the "Comment as" list below

Wednesday, September 14, 2011

Eating Traverse City Part I: Old Mission Peninsula


A few years ago, a vacation to Northern Michigan wouldn't have even crossed my mind. Though my brother went to college in Grand Rapids, and I've visited Brandon's family in Kalamazoo many times, I'd always thought of Michigan as a place to visit people. Not so much a trip as a reunion.

But then recently I started hearing about Traverse City, dubbed "an up-and-coming foodie spot," way up the mitten on Lake Michigan. I read in
Bon Appétit
that Mario Batali had a summer home nearby on Leelanau Peninsula, and I heard that Michael Moore, founder of the Traverse City Film Festival, had moved there. My good friend Rebecca sang the praises of the area's local wines–especially its bubblies, and cool climate varietals like Riesling and Cabernet Franc–and delicious farm-to-table restaurants. I read about the many lakes and beaches and hiking trails and vineyards (not to mention cherry trees!) and decided: we MUST go.

After months of dropping hints (I didn't think I was that obvious...), Brandon surprised me with an anniversary trip to Traverse City. He, being the amazing husband he is, booked the flights, the car, and the B&B, and let me do what I do best: plan the meals.


Needless to say, I love to travel. I love the adventure of the unknown, and the joy of discovery. I love the excitement of hopping in a cab, bulging suitcase(s) tucked away in the trunk, and heading to the airport (all the while praying fervently that traffic moves so we don't miss our flight). But perhaps most of all, I love arriving in a new place, dropping my bags, and heading out for an exploratory jog. That's how I get the lay of the land. Unencumbered by technology (no need to tweet on a run!) or expectations, I set out to stretch my legs and just observe. There is often quite a bit of stopping and starting on these jogs, I admit, to check out the menu at a cute café or peep in the window of a local gallery, or run down an unmarked trail just to see where it leads. Often by the time I've finished that first run, I've got our meals mapped out, a list of spots I want to visit, and already feel–sort of–like a local. Which in Traverse City, with its compact downtown and super-friendly residents, isn't difficult.


We ate a fantastic meal our first night at Cook's House, a cozy 8-table restaurant that has gotten national praise for its ultra-local, sustainable fare. You can try the seasonal five-course tasting menu for $50 with beautifully plated dishes like heirloom tomatoes with warm lobster mushrooms, beet risotto with chocolate shavings–so good that I, a non-beet-eater, actually liked it–and a local white fish called walleye, served in a delicate miso broth with rapini. For an added cost, they'll pair (mostly local) wines with each course–definitely worth the extra money to sample all the wines. We especially loved the L. Mawby Brut Blanc de Noirs and the Two Lads Pinot Grigio. Fortunately for us, it was just a couple minutes' walk back to our B&B, the antiques-filled Wellington Inn.


We headed out the next morning to explore Old Mission Pennisula, a skinny, 22-mile-long peninsula that juts out into Lake Michigan's Grand Traverse Bay. Despite its petite size, Old Mission has seven wineries, a brewery, six restaurants, four B&B's, and more farm stands than I've ever seen in my life. We had perfect blue-sky weather all weekend, so with the windows rolled down and old Nirvana tunes blaring from the radio, we meandered along the lake and through the tree-shaded back roads on our way to visit Two Lads winery. Not to wax rhapsodic, but the scenery was pretty spectacular. With its rolling hills–covered alternately in vines or forests–and rows and rows of fruit trees (cherries, peaches, apricots, and apples), plus lake views from all sides, B and I almost felt like we were back on our honeymoon last year on Waiheke Island in New Zealand. (And to think, we could have saved ourselves a 24-hour flight!)


We stopped off at a fruit stand on the way to buy some blackberries, peaches, and apricots. There was no one at the stand, just a sign that read: SELF SERVE. MAKE CHANGE IF YOU NEED TO. THANKS, JULIE. She then had a second sign saying checks could be made payable to her. These two memos were taped to the table, beside a very large coffee can with a plastic lid: the deposit box, presumably. I couldn't believe this woman was so trusting, but yet, come to think of it, none of the other farm stands were occupied either. We picked out our fruit, paid, and were on our way.

We stopped off at a winery (who will remain unnamed) whose tasting room was–in total contrast to the manicured vineyards outside–total kitsch. Packed with tourists, it resembled a Cracker Barrel gift shop, selling farm animal dish towels and wine- and cherry-themed tschotskes. We slowly edged out the door and headed up north. A word of warning to French-wine lovers: sweet wines are all the rage in Upper Michigan (late-harvest Rieslings, sweet reds, cherry wines, etc.). Though I prefer drier wines, the tasting experience is still a lot of fun. You can pop in any winery (no appointment necessary) and taste five or six wines for just $5. And there's absolutely zero pretension–everyone is having a blast and the mood is contagious. (Note: We didn't make it to Brys Estate Winery, which makes an earthy, aromatic Pinot Noir that I sampled for dinner one night. Nearby Bowers Harbor Vineyard also has some nice wines, and a lovely back patio for tasting.)


Several miles up the road, Two Lads feels world's apart. With its ultra-modern corrugated metal exterior and concrete and steel interiors, the winery is both sleek and functional–and happens to offer the best views in the area. We opted to do their six-wine tasting (along with a little tapas plate) and enjoyed not only sampling the wines, but talking to their knowledgeable staff. Opened in 2008 by the "two lads," South African-born Cornel Olivier and Traverse City-native Chris Baldyga, the winery is the newest in the area, as well as the smallest: they only produce about 4500 cases per year. We were amazed, given the preferences of other local wineries, to taste how dry the Two Lad's wines were. Their Riesling was crisp, with a lively acidity, and the Cabernet Franc rosé was super dry, with a surprisingly peppery finish. Unfortunately we didn't get to taste the wines they are best known for–their Cabernet Francs, Pinot Noirs, and sparkling wines–as they were all sold out. Clearly that's good news for them, and for us too: we'll just have to come back for a visit next year.


We continued our drive up to the tip of the peninsula to the Old Mission Point Lighthouse. Built in 1870, this beautifully preserved lighthouse sits on a rocky beach, with picnic areas and hiking trails and a cool little museum telling the history of the lighthouse. After climbing up to the top of the lighthouse and taking some self-portraits on the beach (see below) we headed back down the peninsula for a late lunch at the Jolly Pumpkin Brewery. Located next door to the upscale Mission Table (which has its own blog post coming soon) on the former historic Bower's Inn property, Jolly Pumpkin brews all sorts of beers, including some award-winning Belgian-style pale ales. Unexpectedly, we discovered our favorite beer of all time, their Oro de Calabaza, which happened to be on tap for the first (and only) time all year. Neither of us are big beer drinkers, but after tasting this aromatic, slightly spicy Belgian-style golden ale, we were hooked. And apparently, so is Eric Asimov of the New York Times: last year he ranked this beer the #1 Belgian Pale Ale in the world. Lunch was fantastic–crab tots (crab cakes + tater tot shape = genius) with preserved lemon aioli, local whitefish dip, and ribs for B. After a day of exploring, wine tasting, and a late brewery lunch, naps on the beach were definitely in order. And, for the record, any place that has vineyards and beaches a few miles a part, is my kind of place.

Stayed tuned for Traverse City Part II: the best croissants in North America, bubbly tasting on the Leelanau Peninsula, and hiking in the Sleeping Bear Dunes National Park...


click for recipe & more…
Your two cents...

If you don't have a Google login, please select Name/URL from the "Comment as" list below

Friday, September 9, 2011

Yellow Tomato Gazpacho & Cumin-Rubbed Shrimp


As you can tell from my previous post on heirloom tomatoes, I’m clearly a fan. AND given that it's early September, our days are numbered to enjoy these beauties. But if I had to pick a favorite, I’d confess that I especially love the bright yellow ones. Slightly sweeter and less acidic than their red brethren–and only available for a few weeks out of the year–golden tomatoes are fantastic pureed with cilantro, cucumber, and a dash of sherry vinegar into a silky-smooth gazpacho, or simmered with some garlic, onion, and thyme into a golden sauce to drizzle over grilled fish.

The summer I spent working and studying at Chateau du Fey, in Burgundy, France, I had my first introduction to yellow tomatoes. We encountered them at the market in Joigny, and brought them home to make a summery yellow tomato gazpacho, inspired by a recipe from one of my all-time favorite cookbooks: Suzanne Goin’s Sunday Suppers at Lucques (Knopf, 2005). The summer was blazing hot, with highs in the upper 90’s, and we had no air-conditioning. Just the thought of turning on the oven made us sweat, so we stuck to cold dishes. The yellow tomato gazpacho quickly became a favorite–cool and refreshing, and chock full of vegetables and herbs, it was one of the few things we actually enjoyed eating in the heat.


Five years later, I’m still making the soup, albeit with a few small changes. I do think it’s a good idea to blanch and peel the tomatoes as Goin’s recipe recommends, though I don’t bother straining it at the end; I like some texture to remain. I’ve swapped out the red wine vinegar for sherry vinegar, and I love adding thinly sliced radishes as a garnish. And last, if I’m serving this as a main course, I like to add a few cumin-rubbed grilled (or sautéed) shrimp to make it a bit heartier.

Beyond being healthy, delicious, and hyper-seasonal, I love this dish because it is perfect for entertaining: everything can be made totally in advance, chilled, and assembled at the last minute. And because it’s so beautiful with all its colors and garnishes, you’ll be guaranteed to get oohs and ahhs from your guests.

YELLOW TOMATO GAZPACHO

Serves 4 as a main course (or 6 as a starter)

2 ½ pounds ripe yellow tomatoes
1 hothouse cucumber, seeded
½ jalapeno, seeded and cut in half
4 sprigs cilantro, plus extra leaves for garnishing
2 cloves garlic, peeled and coarsely chopped
2 tablespoons sherry vinegar
1/3 cup extra-virgin olive oil, plus more for drizzling
Sea salt and freshly ground pepper
3 small radishes, thinly sliced
3 tablespoons finely diced red onion
18 small red and yellow cherry tomatoes, halved

Cut an “X” in the bottom of each tomato with a paring knife. Blanch the tomatoes in boiling water for 30 seconds to a minute until the skins begin peeling away. Remove the tomatoes with a slotted spoon and plunge immediately into a bowl of ice water. Cool the tomatoes for a few minutes, then use your fingers to slip off their skins. Remove the cores, then cut the tomatoes in half and squeeze the juice into a large bowl. Coarsely chop the tomatoes and place them in the bowl with the juices, pouring in any extra juice from the cutting board.

Carefully dice about three tablespoons’ worth of cucumber for garnish; set aside. Peel the remaining cucumber and coarsely chop; add to the bowl with the tomatoes.

Add the jalapeno, cilantro, garlic, red wine vinegar, and olive oil and gently stir to combine. You will need to blend the soup in two batches: Place half tomato mixture into the blender with a teaspoon of salt and some peppers. Pulse on low to break down the ingredients, then puree on high until smooth. Pour into another large bowl, and repeat with the remaining ingredients. Taste the soup and season with additional salt and pepper if necessary. Cover tightly and chill for several hours.

Prep the garnish ingredients and set aside.

To serve, pour the soup into four large bowls (or six small ones) and garnish with diced cucumber, red onion, radish slices, cherry tomatoes, cilantro leaves, and shrimp (recipe below). Drizzle with olive oil just before serving.

CUMIN-RUBBED SHRIMP

Serves 4 (or 6 as a starter)

12 medium-sized shrimp, peeled and deveined (tails in tact)
1 teaspoon cumin
¼ teaspoon cayenne
1 clove garlic, peeled and crushed
1 tablespoon olive oil
Sea salt and freshly ground pepper

Preheat a grill pan or nonstick sauté pan over medium-high heat.

Place the shrimp in a medium bowl with cumin, cayenne, garlic, and olive oil. Stir gently with a plastic spatula until the shrimp are coated. Season on all sides with salt and pepper.

Grill or sauté the shrimp for about 3 to 4 minutes or until pink on all sides and beginning to curl.

Let cool slightly before serving with gazpacho.


click for recipe & more…

Add a comment!
Your two cents...

If you don't have a Google login, please select Name/URL from the "Comment as" list below

Thursday, September 8, 2011

Secret Weapon: Fleur de Sel de Camargue


You may be wondering what exactly fleur de sel de Camargue means, and why it's a secret weapon. Well I'm glad you asked. First of all, fleur de sel (literally translated "flower of the salt") is a top-quality sea salt that is hand-raked and harvested in France. Specifically, this sea salt comes from the Camargue, a wild, marshy area in the southwest corner of France known for its rice, its horses, and–you guessed it–sea salt. Fleur de sel's coarse granules are incredibly flavorful and have a way of drawing out the flavor in any food, from roasted fish to grilled veggies or even a simple salad. I love sprinkling it over a ripe tomato or a juicy piece of cantaloupe, in olive oil (for dipping bread), or even in chocolate chip cookie batter. I'm obsessed.

Though this highly prized sea salt is intended as a "finishing salt" (i.e. used just to sprinkle on foods before serving), I use it all the time in cooking. I love its intense flavor and coarse texture, especially in a dish like roast chicken, where it's nice to have the crunchy salt granules baked into the skin. I stock up on fleur de sel whenever I'm in France–it's really inexpensive at any local grocery story there–or you can order it online at
SaltWorks for $8.99. A little bit goes a long way, so a 4.4 ounce container should last you awhile. When I'm cooking, I like to put some fleur de sel in a little bowl so I can just sprinkle it into dishes as I go.

I know salt gets a bad rap these days, but all-natural sea salt actually has some important health benefits. Packed with minerals and micro-nutrients, sea salt (unlike refined table salt) actually helps your body absorb nutrients and can aid your body in regulating blood pressure. Eliminating all salt from your diet could actually have a negative effect on your body (not to mention your taste buds!). Of course, everything in moderation, but a little sea salt is far better for you than refined table salt.

So why is it a secret weapon? Because it honestly makes everything taste better! I used this salt in every single dish last night (roast chicken, roast potatoes, salad) and with little effort on my part, the flavors were fantastic. Without any further ado, I want to leave you with the a recipe for an easy Dijon vinaigrette that's delicious on salad greens, steamed green beans, or drizzled over leftover roast chicken or pork. This is a perfect example of a simple recipe that tastes oh-so-much-better with a little sprinkling of fleur de sel...try it for yourself and see!

DIJON VINAIGRETTE

Makes about 1/2 cup

1/2 medium shallot, minced
2 teaspoons Dijon mustard
2 tablespoons red wine vinegar
1/3 cup extra virgin olive oil
Fleur de sel and freshly ground pepper

Whisk together the shallot, mustard, and vinegar in a small bowl. Slowly add the olive oil in a steady stream, whisking constantly to combine. Season with a good sprinkle of fleur de sel and some freshly ground pepper.

You can store the remaining vinaigrette in the refrigerator for 1 to 2 days.

click for recipe & more…

Add a comment!
Your two cents...

If you don't have a Google login, please select Name/URL from the "Comment as" list below

Wednesday, September 7, 2011

Roast Chicken for a Rainy Night

I try and get together with my best girlfriends a couple times a month for dinner, with plenty of wine, lots of stories, and usually at least one squeal-inducing announcement. We’ve toasted each others’ engagements, new marriages, new jobs, new apartments, and pregnancies, and helped each other through the rough spots as well: breakups, job losses, marriage troubles, moves, and illness. Our times together are absolutely integral to living life in crazy New York City–we always leave our dinners feeling a little lighter in spirit, and feeling blessed to have sisters with whom to share our journeys.


We usually alternate apartments, but last night was my night to host and I was completely stumped on what to make. (Funny, you’d think with a new blog, I should be overflowing with ideas!) I had originally planned to make something Provencal–grilled sea bass with a green bean and heirloom tomato salad. Then I walked outside and was hit with a chilly blast of rain. Ugh. Not exactly the eat-on-the-terrace sort of evening I was hoping for.

As I walked to the grocery store huddled under my broken umbrella, I completely revamped my menu. This was definitely not the night for grilled fish and rose. A cold, rainy night calls for comfort food, I thought, and there is nothing cozier than a golden roast chicken and potatoes. And a nice green salad with Dijon vinaigrette…and perhaps an earthy Cotes du Rhone... By the time I arrived at the store, I was grabbing ingredients like a woman on a mission: fresh thyme, shallots, baby potatoes, salad greens, and an Amish farm-raised chicken (a happy chicken tastes better, right?). I barely felt the rain on my walk home, imagining how delicious the apartment would smell when everybody arrived.


This meal was a big hit. The chicken came out perfectly crisp and golden (check out the technique in the recipe), and needed no other sauce than the delicious pan juices. Roasted potatoes, seasoned with just a little olive oil and some sea salt, and a green salad rounded out the rainy night dinner. But honestly, we were having so much fun sitting around the yellow table, talking and laughing, we probably could have eaten anything and still had a great evening.

HOW TO ROAST A CHICKEN

In my opinion, the best way to roast a chicken is on really high heat (450 degrees F) for a shorter amount of time (about an hour), rather than lower heat for longer. The high heat makes the skin perfectly crisp and golden, and the meat turns out phenomenally juicy.

There’s a million ways to season a chicken, but I say the simpler, the better. I like to throw in some lemon and shallot wedges and fresh thyme to the cavity, but you can use onion or another herb like marjoram or oregano–this will infuse the chicken with a wonderful lemony-herb flavor. Rub a little butter all over the bird and season it with sea salt, pepper, and some fresh thyme. Now for the fun part: trussing. (Trust me, it sounds worse than it actually is).


Basically, trussing is a fancy word for “tying.” You will need about two feet of butcher’s twine to tie the drumsticks together and to secure them to the side of the bird. Once your twine is tied, tuck the wings underneath the bird. (There are plenty of good YouTube instructional videos on this…I will eventually put one in my How-To section!) Why do you need to truss? Not only does trussing make for a better presentation, it helps the bird roast evenly. A trussed chicken–with everything tucked and tied in to the sides–holds in the heat and allows the bird to cook evenly throughout.

Once your chicken is seasoned and trussed, place the chicken in a roasting pan or ovenproof sauté pan, scatter extra shallots in the pan, and roast for about an hour (depending on the size of your bird) or until golden brown. A thermometer inserted into the deepest portion of the thigh should 165 degrees F.

Let the meat rest about 15 minutes before carving, then serve your chicken pieces on a platter, drizzled with the pan juices, roasted shallots, and roasted potatoes (recipe below). Voila! A perfect rainy night dinner.


ROAST CHICKEN WITH LEMON, THYME, AND SHALLOTS

Serves 4 to 6

One 3-4 pound farm chicken
½ lemon, cut into 3 wedges
6 shallots, peeled and halved lengthwise
Fresh thyme
1 tablespoon butter
Course sea salt and freshly ground pepper
Roasting pan or ovenproof sauté
Butcher’s twine

Preheat the oven to 450 degrees F.

Rinse the chicken and pat dry, making sure to remove the giblet package in the interior cavity. The drier the chicken, the better, as extra moisture creates steam while cooking. Season the cavity with salt and pepper and add the lemon wedges, a couple shallot halves, and 7 or 8 sprigs of fresh thyme. Rub the chicken all over with butter and season generously with sea salt, freshly ground pepper, and extra thyme leaves.

Truss the chicken with butchers twine (see above for more details) and place the chicken in a roasting pan or ovenproof sauté pan. Scatter the remaining shallots in the pan.

Roast the chicken for a little over an hour, or until the skin is golden brown and the internal temperature (taken at the deepest portion of the thigh) registers 165 degrees F. Cover the bird loosely with foil and let it sit for about 10 to 15 minutes before carving.

To carve: Remove the twine and, using a sharp knife and a fork, pull out each leg and gently cut along the joint. The joint bone will pop out: that’s where you want to slice. The thigh and the leg will be connected, so separate each piece into two (thigh and drumstick). To remove the breast meat, carefully carve along the breastbone on each side, using a fork to steady you. The wings will still be attached, so you will need to cut those off. Slice each breast into two to three pieces so everyone can have some white meat.

Serve with roasted potatoes (recipe below) and a simple green salad with Dijon vinaigrette.


ROASTED BABY POTATOES

Serves 4

1 ½ pound tricolor baby potatoes
1 to 2 tablespoons olive oil
1 teaspoon sea salt

Preheat oven to 450 degrees F.

Cover a baking sheet with aluminum foil. Toss the potatoes with the olive oil and salt and roast for 20 to 25 minutes or until golden brown and slightly crisp on the outside.

(Tip: Just place the potatoes in the oven during the last 20 minutes of the chicken’s roasting time. That way the chicken and potatoes come out of the oven at the same time!)


click for recipe & more…
Your two cents...

If you don't have a Google login, please select Name/URL from the "Comment as" list below

Monday, September 5, 2011

Welcome to The Yellow Table!


Welcome to The Yellow Table–a place of laughter, friendship, conversation, celebration, and of course, good food. This table has been a part of my life for 31 years. I grew up having family meals and dinner parties around the yellow table (pictured above), and as a college graduation present in 2002, my mom passed it along to me. Since then, it's been a joy to keep the legacy of the yellow table alive, with countless dinner parties in my various apartments–in Pittsburgh, Nashville, and finally, New York City.

THE STORY

The inspiration for this blog first came in 2007, right before I moved to New York. I was leaving Nashville (and my friends, my job, and my beautiful, big, apartment!) to pursue a career in food journalism. The table, along with all my other stuff, was packed away in storage, and I headed to New York City with a just a few suitcases, a couple hundred dollars, and big dreams.  I had the idea then of starting The Yellow Table, as a place to keep the table's spirit alive while it sat in storage, and an outlet for me to share recipes and stories.

However, I hit the ground running in Manhattan, working as a personal chef, a recipe tester, and a magazine editor, and living in a tiny closet-sized space with a curtain for a door. There was no time for blogging, and no space for dinner parties, but I fell madly in love with the city and soaked up every moment of my new, very busy life. In early 2009, after the economy had crashed and my magazine had folded (i.e. no job for me), I finally started cooking at home again. A new blog, The Recession Cookbook, was born–a collection of simple, fresh, affordable recipes that made penny-pinching enjoyable.

By 2010, the economy had calmed down a bit, I had a new job, and two exciting things happened: I got married to my wonderful husband Brandon (in the picture above) and I was finally able to bring the yellow table to New York City! My mom and I made the 900-mile trip from Nashville to Manhattan with the table in the back of U-Haul truck (then had to get it up six flights of stairs with the help of Brandon and a friend, but that's another story...). We celebrated the arrival of the table last November with ten of our dearest friends and a Thanksgiving feast.

THE BLOG

Now fast-forward to today. After a busy summer of recipe-developing and writing (me), web designing and code tweaking (Brandon), we are so excited to finally launch The Yellow Table. This blog will have the same type of simple, healthy, affordable recipes as its predecessor The Recession Cookbook, but it will be focused less on thrift and more on fresh, seasonal ingredients.

Beyond great recipes, this blog will delve a bit more into my philosophy of “living life around the table.” I love the idea of making the table (rather than the TV) the center of the home, as a place to tell stories, exchange ideas, laugh, and build relationships. Food is the connector, but the table is where the magic happens.

In addition, there will be a great “how-to” section that will teach you useful cooking techniques like how to roast a whole fish, or how to make your own vinaigrettes.  And tasty tidbits from my travels–photos, recipes, and insider tips on where to stay and eat.

I’ve been busy cooking this summer while the produce has been at its peak, so you’ll find a few recipes already on the blog, and of course keep checking in, as I will be posting new recipes and tips several times a week.  I hope The Yellow Table will encourage you to clear off your own table and gather a few friends around for good food and conversation…maybe even tonight!

click for recipe & more…
Your two cents...

If you don't have a Google login, please select Name/URL from the "Comment as" list below

Friday, September 2, 2011

Crostini with Herbed Ricotta and Fresh Figs


One of my favorite appetizers of all times is Andrew Carmellini's herbed ricotta with grilled crostini at
Locanda Verde. Creamy fresh sheep's milk ricotta is whipped together with milk, seasoned with sea salt, black pepper, and herbs (he uses fresh thyme and dried oregano), and drizzled with extra virgin olive oil. The combo is, quite frankly, dangerously good.

I have made my own version of this dish many times at home, eliminating the milk (I like the texture to be a bit more rustic), playing around with the herbs and seasonings, and adding a variety different toppings. I love adding fresh basil in the summertime, topped with oven-roasted tomatoes, or slices of grilled eggplant or zucchini.

But one of my all time favorite toppings, especially in late summer and early fall, is fresh figs. The mild, herb-filled ricotta is the perfect compliment to sweet, ripe, fig slices.  And, if you have some prosciutto, even better! Best of all, this appetizer is so easy to assemble: make the ricotta spread up to a day ahead, and simply assemble the crostini before your guests arrive.

CROSTINI WITH HERBED RICOTTA AND FRESH FIGS

(For a delicious breakfast, simply spread plain sheep's milk ricotta over the crostini, top with fig slices, and drizzle with honey.)

Serves 4 to 6

1 wholegrain baguette, sliced thinly
2 cups sheep's milk ricotta
2 teaspoons fresh thyme leaves
1 teaspoons dried oregano (or substitute other fresh herbs)
Sea salt and pepper to taste
2 to 3 tablespoons extra-virgin olive oil
Fresh figs, sliced
Prosciutto (optional)

Preheat your oven to 425 F.  Brush the baguette slices lightly with olive oil and arrange on a sheet tray.  Bake for 3 to 4 minutes per side, or until golden brown.  Let cool slightly.

Place the ricotta in a bowl and stir in the thyme, oregano, salt, pepper, and olive oil with a wooden spoon until well combined.  Taste and adjust seasonings if necessary.

Dollop each crostini with about a tablespoonful of ricotta spread.  Drizzle with a bit of olive oil, and place a fig slice or two on top.  (Optional: layer with a thin slice of prosciutto.)

click for recipe & more…
Your two cents...

If you don't have a Google login, please select Name/URL from the "Comment as" list below